Try the sandbox
A hosted, zero-setup demo: describe a domain in plain words, watch a model get generated, then type into it and see every derived value recompute live.
- What it is
- 1. Describe a model
- 2. Interact with it
- 3. Look underneath (advanced mode)
- 4. Change the model without losing your data
- 5. Keep or share what you built
- 6. Let an AI agent drive it
- Next
What it is
The sandbox is a hosted playground in front of a real Valem runtime — the same engine this documentation describes. Nothing is installed, no API key is needed, and the models you create are yours for the session (your browser also keeps a local recovery copy, so a reload doesn’t lose your work).
It is the fastest way to answer “what does a Valem model actually feel like?” before you run anything locally.
1. Describe a model
The landing screen asks one question: what should this model compute? Describe the domain in plain language — the fields, the arithmetic, the rules:
A car loan calculator: loan amount, annual interest rate, and term in months. Compute the monthly payment, total interest, and total cost. The monthly payment must not exceed 40% of the borrower’s monthly income.
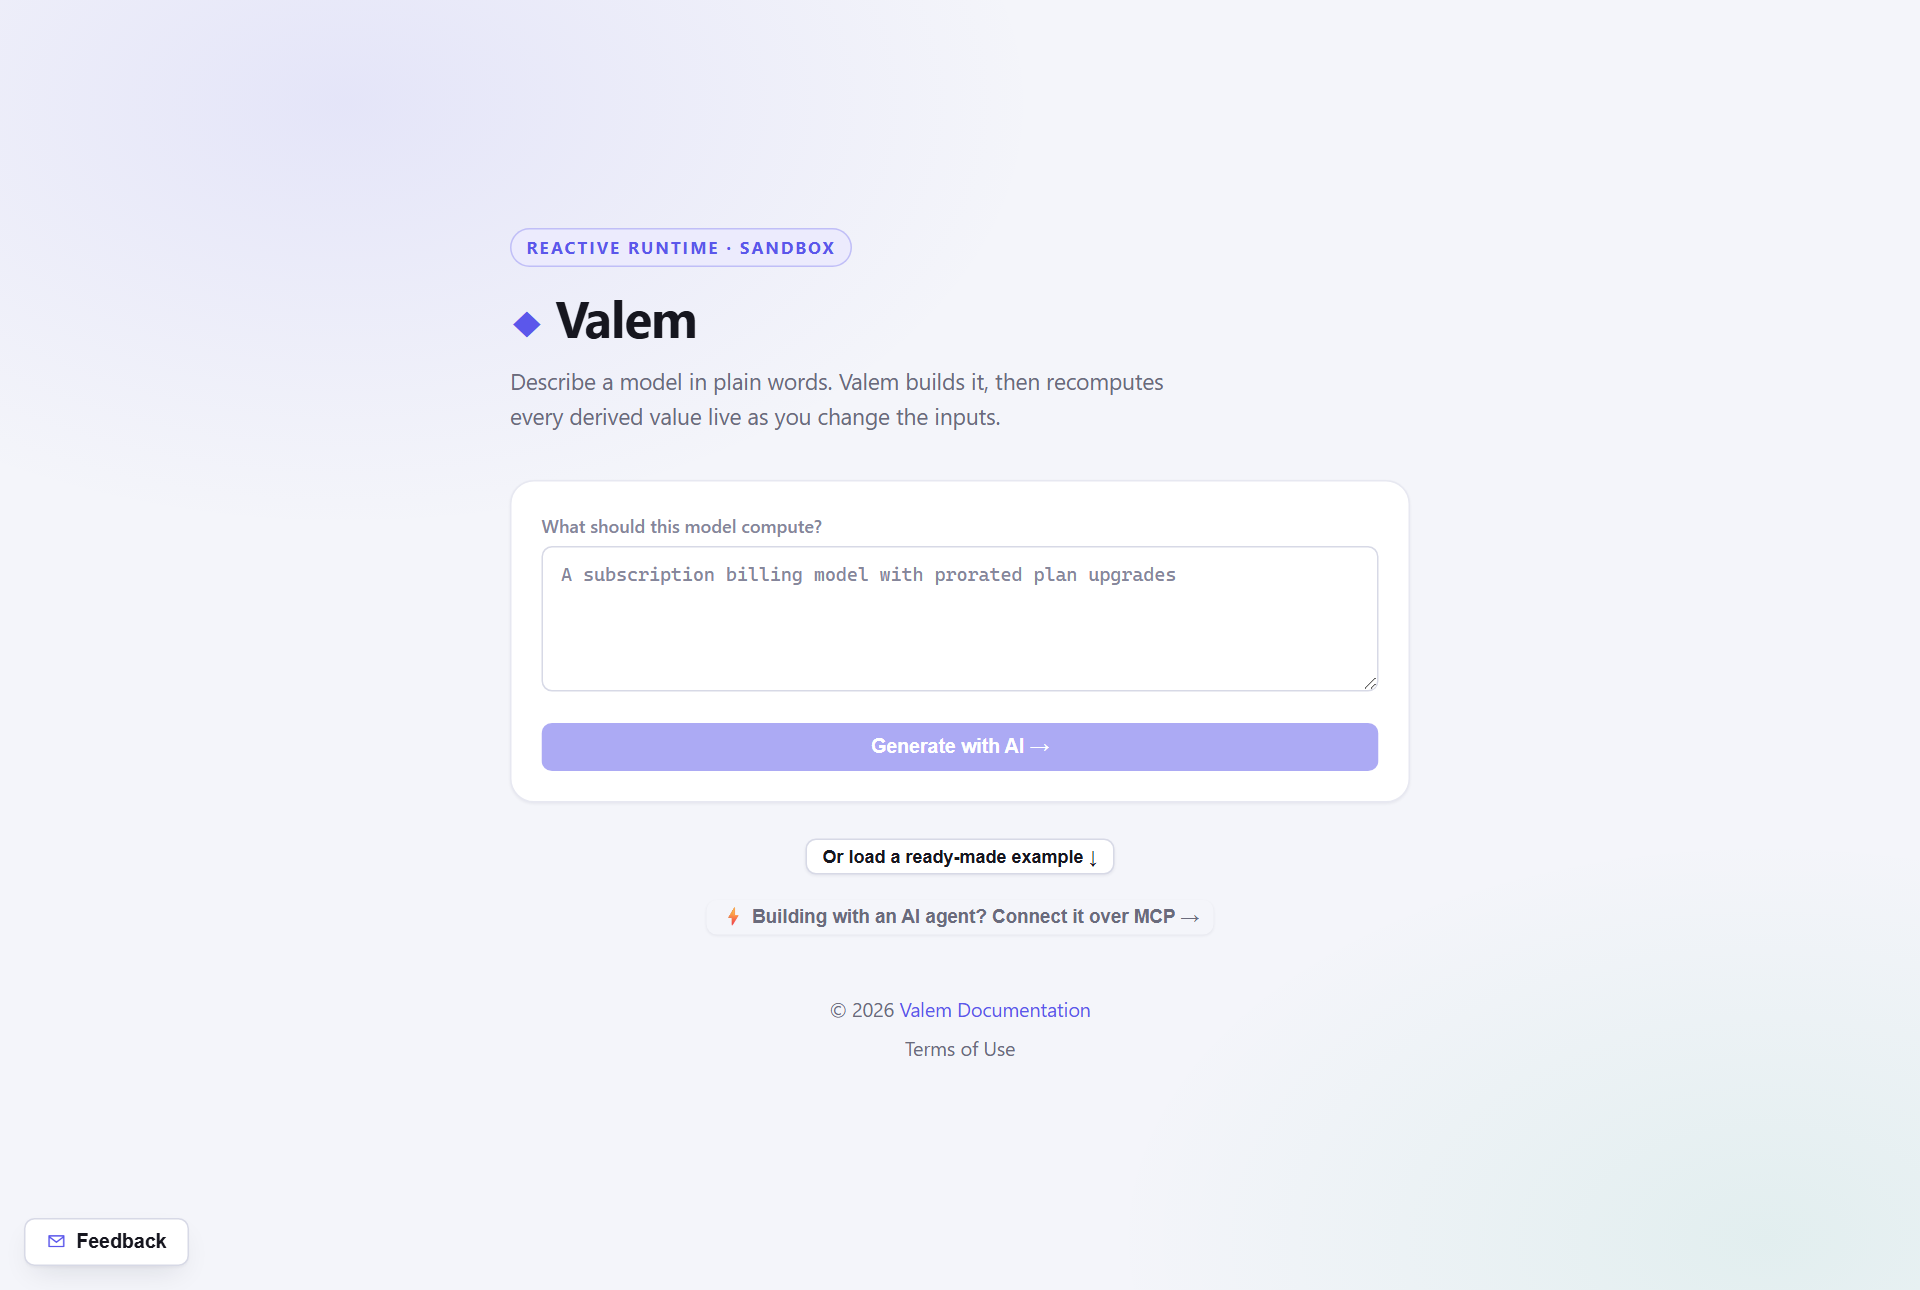
Press Generate with AI. An LLM compiles that description into a ModelSpec, and Valem
validates it and feeds any errors back for repair before the model is created — you see the steps
stream past while it works, and you can cancel a run that’s taking too long. What comes back is a
runnable model, not a suggestion.
Prefer to skip generation? Load a ready-made example opens a picker of bundled specs (a car-loan calculator, an insurance quote, order totals, a savings-growth chart, a self-refreshing world clock). The same specs are documented in the examples gallery.
Generation needs the hosted LLM, which is rate-limited to keep the public demo up. If it’s unavailable, the examples still work — they exercise the runtime exactly the same way.
2. Interact with it
The generated model opens in its own screen with the rendered view — the form and read-outs
Valem built from the spec’s viewDefinition. Type into an input and every dependent value updates
immediately; break a rule and the constraint tells you so.
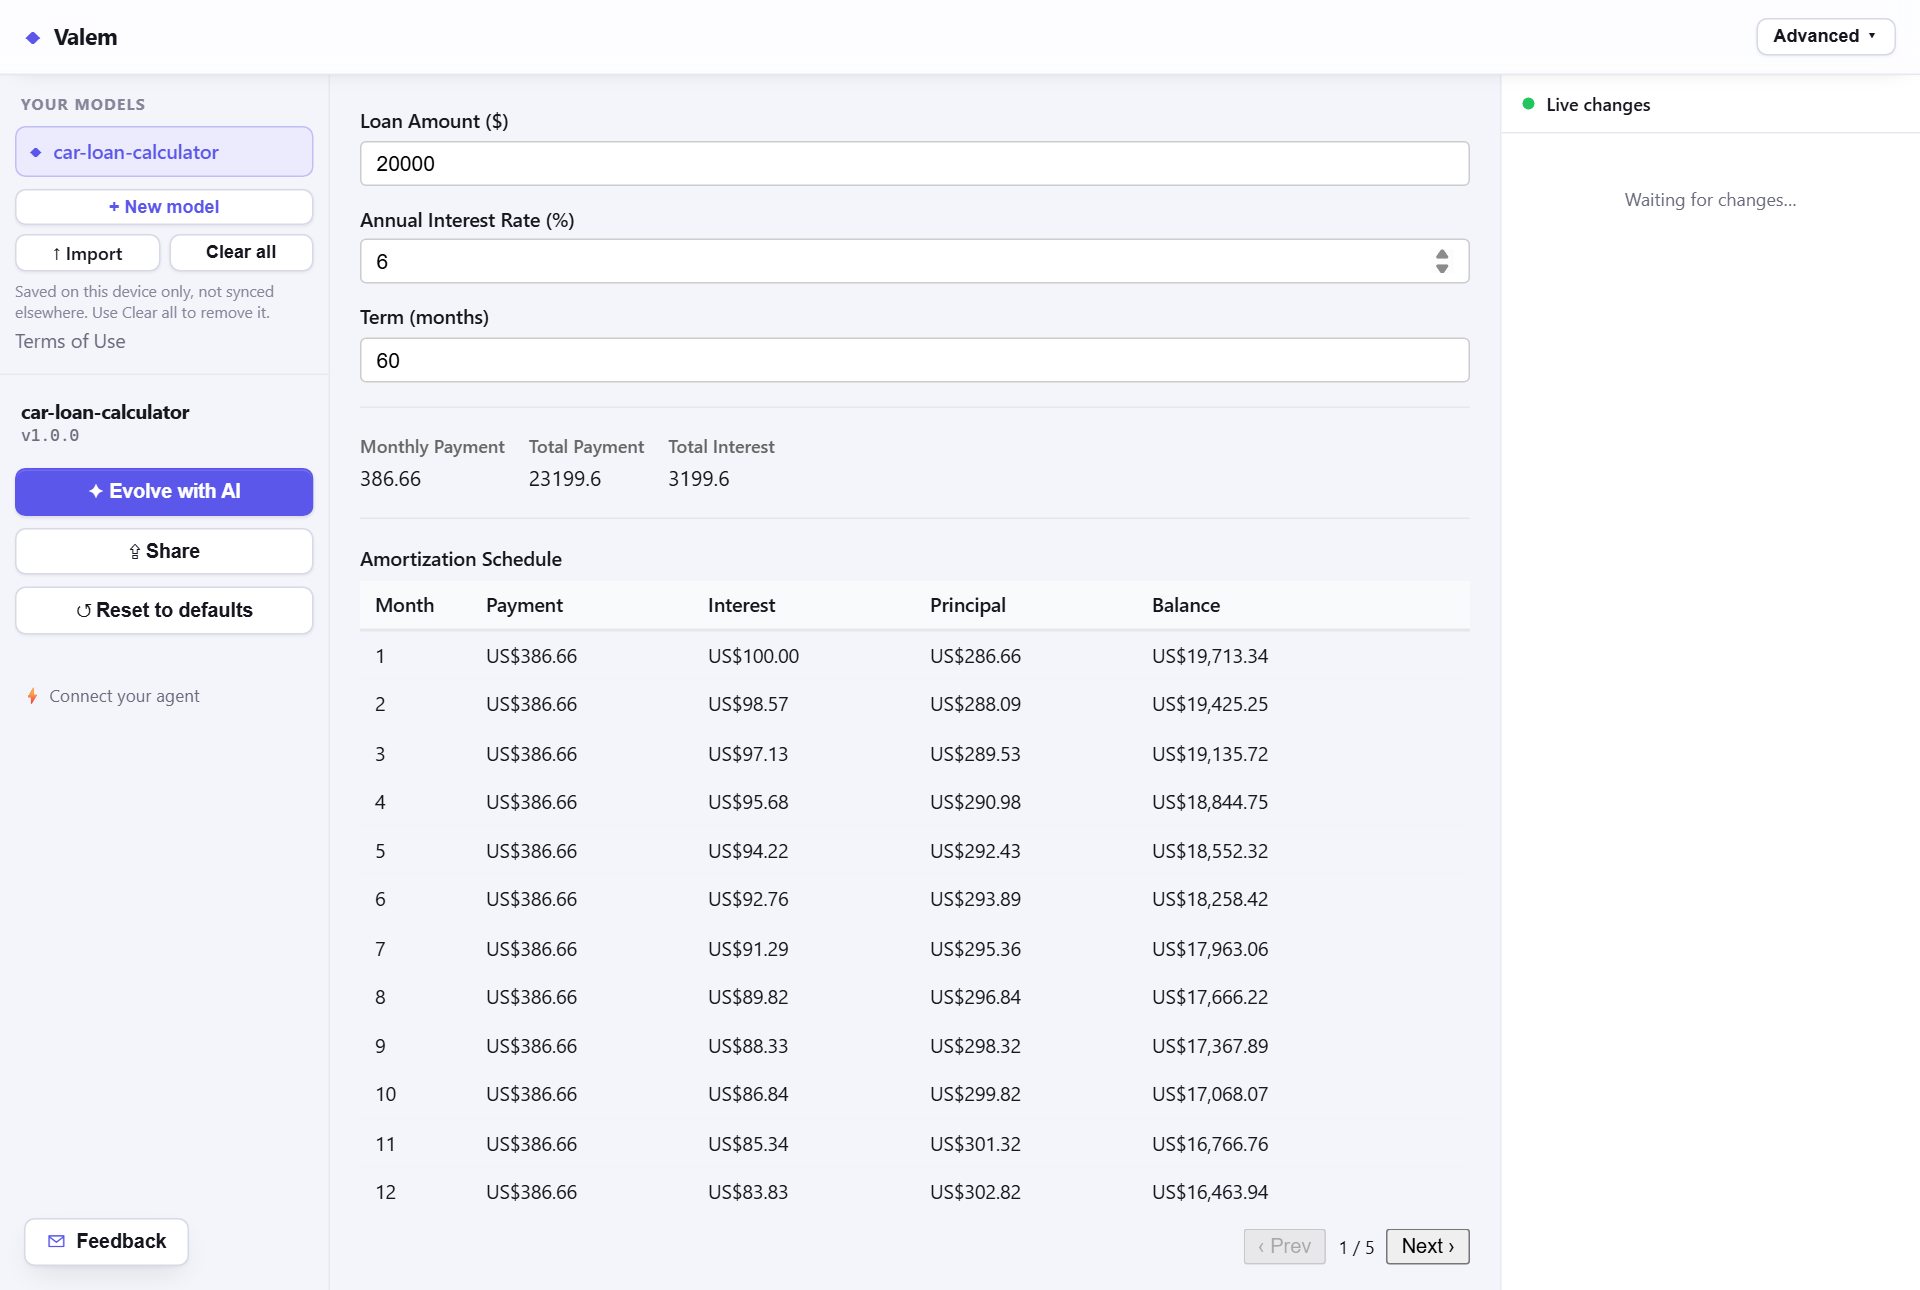
A live feed drawer shows what the runtime did on each change: which fields you mutated, which derived values were recomputed, which constraints were flagged.
That’s the whole point in one screen: you only ever edit base fields, and the runtime keeps everything else true.
3. Look underneath (advanced mode)
The Advanced ▾ toggle in the header swaps the single view for the full panel set — the same surfaces the developer UI exposes:
| Panel | Shows |
|---|---|
| View | The rendered viewDefinition. |
| State | The merged document — base fields plus every derived value. |
| Mutate | Write arbitrary paths by hand ($.loan.amount) and watch the cascade. |
| Explain | Why a value is what it is: the derivation and constraint traces behind it. |
| Schema | The effective schema of a field — its live meta-derived min/max/required. |
| Spec | The raw ModelSpec JSON that was generated. |
| Evolve | Apply a spec evolution (a versioned diff) without losing state. |
| Live | The raw change events pushed over the WebSocket. |
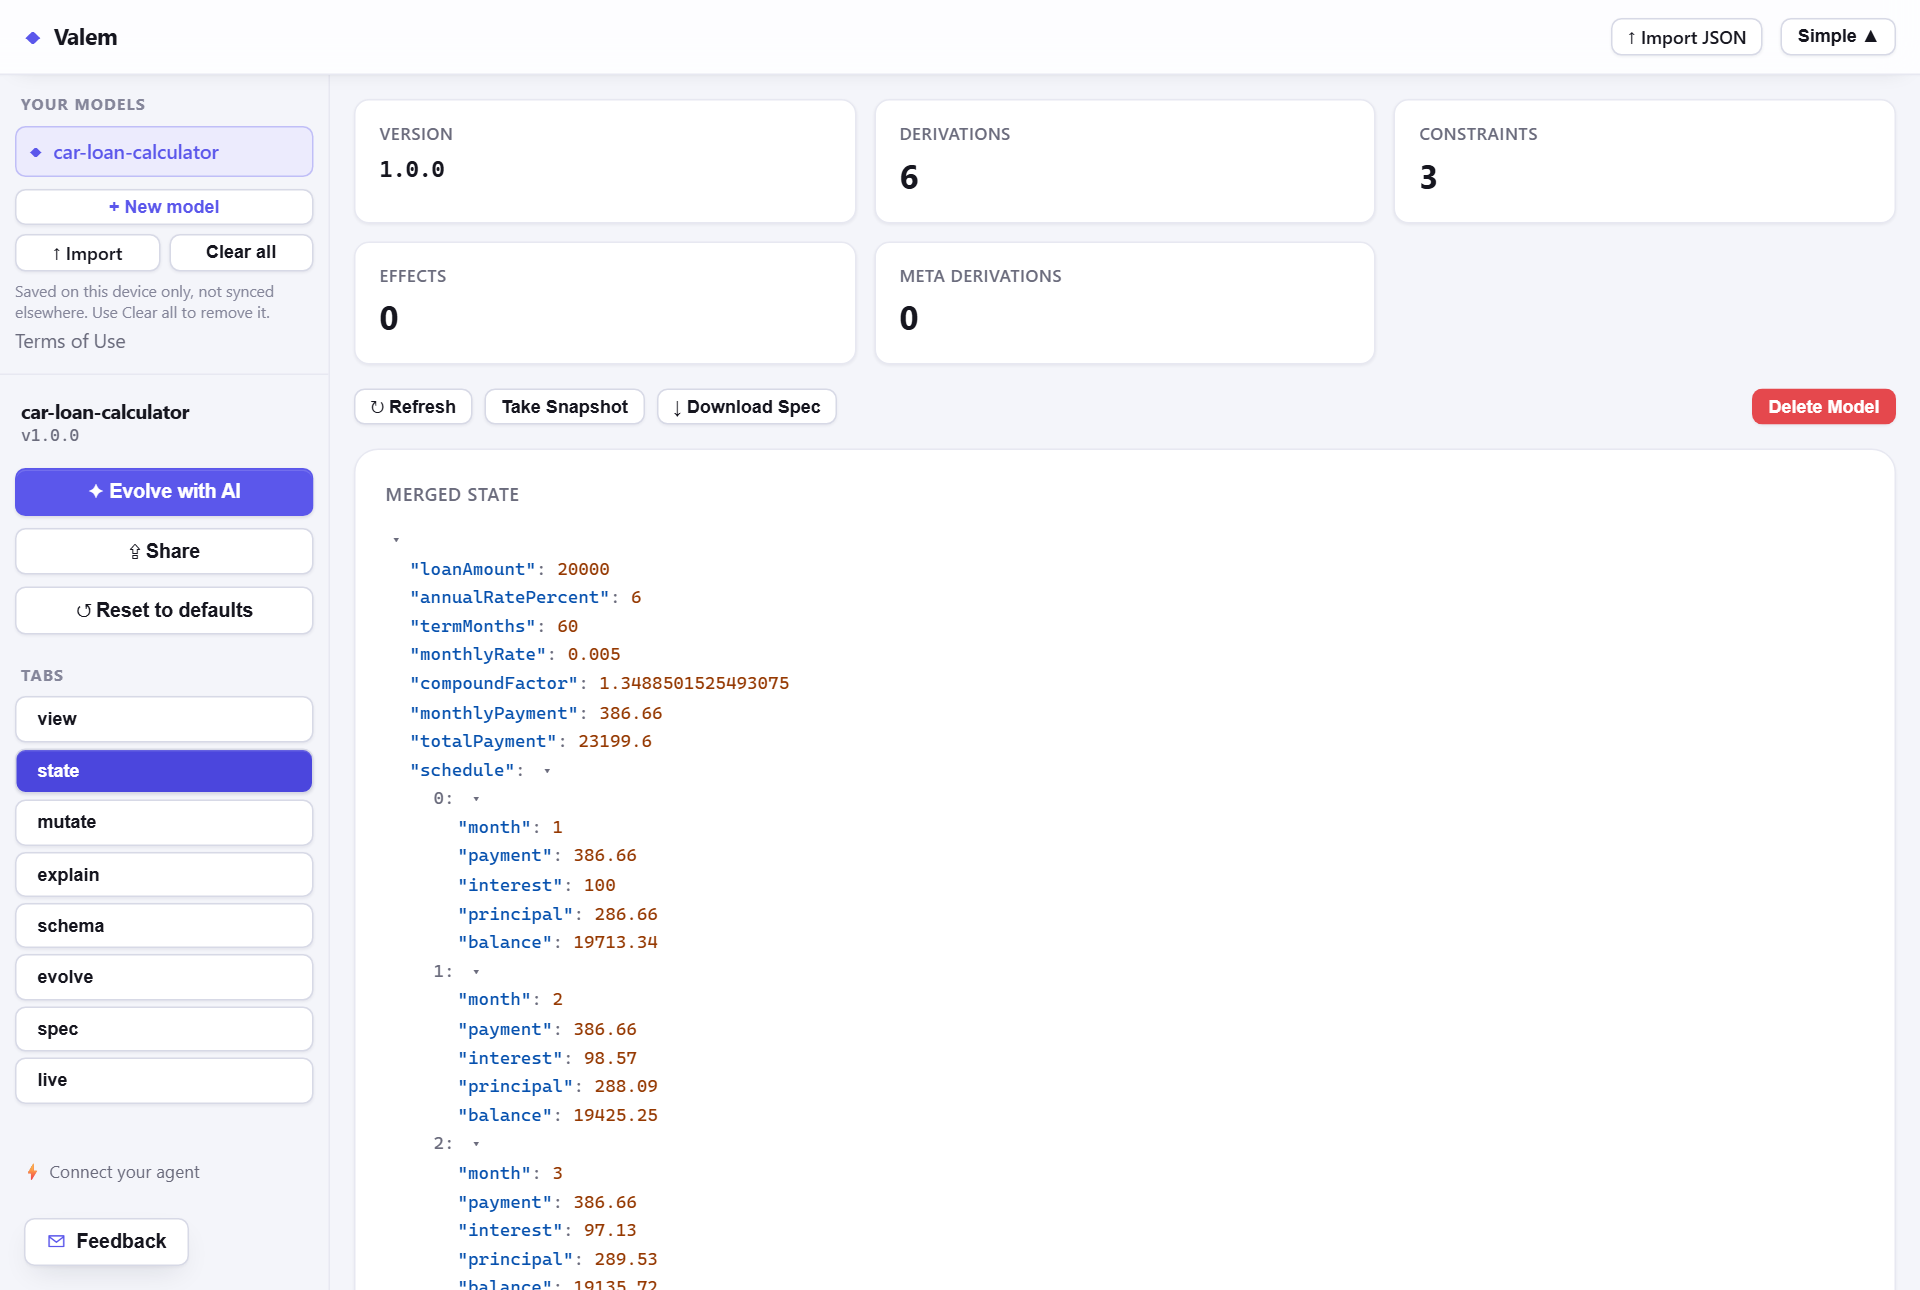
Advanced mode also lets you import a spec JSON file to run a model you wrote yourself.
4. Change the model without losing your data
Several ways, all non-destructive:
- Evolve with AI — describe the change (“add a co-borrower and split the affordability check”) and the model is evolved in place. A toast reports the new version, and View changes lists exactly what was added, changed, or removed. Your entered data carries forward.
- Edit the view — the ✎ Edit view button opens a direct-manipulation editor for the form
itself: drag a component from the palette onto the canvas, click any field to change its label,
binding, or options in the inspector, reorder or delete, then Save view. It is deterministic —
no LLM round-trip — and saves as an ordinary version bump, so View changes, history, and
Revert cover it too. Only the presentation (
viewDefinition) is edited; the schema, derivations, and rules are untouched. - Edit the logic — the ⚙ Edit spec button opens a structured editor for everything behind the form: the schema (which fields exist and their types, with nested objects, arrays, and reusable definitions), constants, derivations (computed fields), meta-derivations (live field metadata), constraints (the rules), effects (side effects — with the right fields per executor), default values, and embedded tests. Each is a form-based list you add to, edit, and remove from — expression fields validate as you type and offer an insert menu of your model’s fields and functions, with a JSON escape hatch when you need it. Also deterministic, and it saves only what you changed as a version bump, so history and Revert cover it the same way.
- Version history — the sidebar keeps the model’s earlier versions; Revert puts one back.
Under the hood these are all spec evolution, described in Composition & branching and, field by field, in the model spec format.
5. Keep or share what you built
From the sidebar you can:
- Share — a link that carries either the spec only or the spec + your data. The spec+data option warns you first: everything you typed travels in the link, and anyone holding it can read it. Don’t put real personal or business data in a shared link.
- Copy JSON / Download .json — take the spec with you and run it locally (
POST /models) or check it into your project. - Your models — the sidebar library keeps the session’s models one click apart; export or remove any of them.
The sandbox is a public demo, not a place to keep anything. Treat every model in it as disposable and public, and run your own server (Deployment) for anything real.
6. Let an AI agent drive it
The most interesting mode: pair the sandbox with your coding agent. The agent authors and evolves the model over MCP while you watch it appear and enter data in the same tab — one shared, live session, no copy-pasting specs.
Look for ⚡ Building with an AI agent? Connect it over MCP on the landing screen, or read Connect your agent for the full walkthrough.
Next
- Quickstart — run the same engine on your machine.
- Usage scenarios — where this fits in a real project.
- Model guide — how to write a spec yourself.